Versatile, colourful and fun to make, creating your own paper umbrellas is a great activity to do with the kids or as a home improvement task!
Making paper umbrellas is straight-forward and fun, but there are some tricks and tips you should bear in mind if you want to give it a go. To learn how to craft the perfect paper umbrella, read our step-by-step guide…
What you need
• Pencil.
• Colourful card or craft paper.
• Floristry wire.
• Plasticine.
• Double-sided sellotape.
• Pliers.
• Scissors.
• Hot glue gun.
• Coaster or tin (anything to trace a circle).
• Thread (optional).
Step 1
Once you have everything you need, take whichever object you’ve chosen to trace a circle (approximately the size of a baked beans tin). Now, use it to draw a circle on your craft paper/card with a pencil. Aim for ten circles).
Step 2
Cut out each circle and fold each one neatly in half. Then, fold them in half again so you get a triangular shape with an arch, instead of a third straight line.
Step 3
Put a small piece of your double-sided tape in the middle, so that your paper or card retains its arched triangle shape. Now, fold and tape each of your ten circles.
Step 4
Once you’ve finished, attach each of the ten arched triangles by using your tape. You should do this by lining up all the folded edges.
Step 5
Now, gently pull the two ends of your paper chain together to make a full circle and use your hot glue gun to attach them. You should begin to see your paper umbrella taking shape here.
Step 6
Think of that as the canopy. Now, you need an umbrella stick. Take your floristry wire and make an approximately 10cm cut.
Step 7
Then, make a small loop at one end of the wire using your pliers (less than the width of the tip of your little finger) and form a larger loop at the other end (this will be the paper umbrella handle).
Step 8
At this point, take a very small piece of plasticine and form an egg shape. Taking the bottom — or handle — part of your wire, press it into the plasticine.
Step 9
Nearly done! Now, simply push the top end of your wire into the centre of your paper umbrella canopy and make sure it doesn’t fall out by carefully applying your adhesive using the hot glue gun.
Step 10
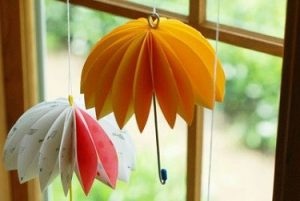
Your paper umbrellas are all finished. Using different coloured plasticine and paper, you can make a rainbow of designs if you wish. Or, why not use your thread to hang them around the house straight away? Simply, tie the thread to the top wire loop and create a beautiful umbrella- scenery!
If you prefer, you can put your paper umbrella to alternative use by using them as a drinking accessory! We advise using a wooden skewer or long toothpick instead of floristry wire, and you should leave out the plasticine attachment at the bottom!
For real umbrellas to keep you safe and dry outdoors, browse our selection of men’s, women’s, children’s, and sports designs before you go.